food

Recipe: Creamy Homemade Dole Whip / Homemade Pineapple Ice Cream

Thursday, August 21, 2014

homemade Disney Dole Whip pineapple ice cream sorbet sherbet recipe

Okay, full disclosure: I've never had the real Dole Whip. But I caught wind of this icy treat online and it sounded absolutely scrumptious. So I decided to try making it at home using all natural ingredients (unlike the actual Dole Whip, which is not really made from fruit at all).

If you've never heard of Dole Whip, it's akin to pineapple-flavored soft serve that can be found exclusively at Disneyland, Disney's Polynesian Resort, Magic Kingdom, and at Dole's processing plant in Hawaii. According to the Disney Wikia:
Though a Dole Whip has the taste and consistency of soft-serve ice cream, the dessert actually gets its texture from ordinary food thickeners. Only a small amount of the milk derivative sodium caseinate accounts for dairy content.
So I did a little bit of poking around online, looking at how people were making their homemade Dole Whips, and I came up with my own little recipe using their experiences. A lot of people use the powdered mix of Dole Whip you can order online, some mix pineapple juice with whipped cream, and yet others use those machines that turn fruit into frozen desserts. My Dole Whip recipe is slightly more work intensive but good if you don't like whipped cream, don't own one of those machines (but own an ice cream maker), or just have a lot of pineapple lying around!

First of all, my recipe is closer to an ice cream than a sorbet. This recipe uses real pineapple (you can use canned), so there were pineapple fibers throughout the finished product. I also read that cooking or roasting fruit brings its flavor out even more (it can also intensify the color), so I started this recipe by cooking the pineapple. This is a step you can also skip. If you don't own an ice cream maker, you can definitely still use a version of this recipe -- instead of pureeing the pineapple and making the ice cream base, freeze it after cooking and toss the frozen chunks into your blender with the cream and milk and blend until it becomes creamy.

Homemade Dole Whip

Yields: Approximately one quart
Total Time: At least 6 hours

Ingredients
1 pineapple, peeled, cored and cut into 1/2-inch or 1-inch chunks (3-4 cups of cubed pineapple)
1 cup of sugar
2 eggs
2 cups of cream
1 cup of milk [You can also substitute the cream and milk combination with 3 cups of half-and-half]
The juice of half a lemon
A pinch of salt

Cook the pineapple, sugar and lemon juice in a saucepan over medium-high heat for 30-40 minutes, or when the pineapple begins to become translucent and the sugar reduces and becomes slightly brown and syrupy. Allow to cool and transfer to a blender and puree. Pour into a plastic bag and freeze for several hours or overnight. 

The next step is creating the ice cream base for the pineapple. In a large bowl, beat the eggs and slowly add the pineapple puree and cream (or half-and-half). Whisk in the milk, if using. Add a pinch of salt, lightly mix, and chill for at least 2 hours.

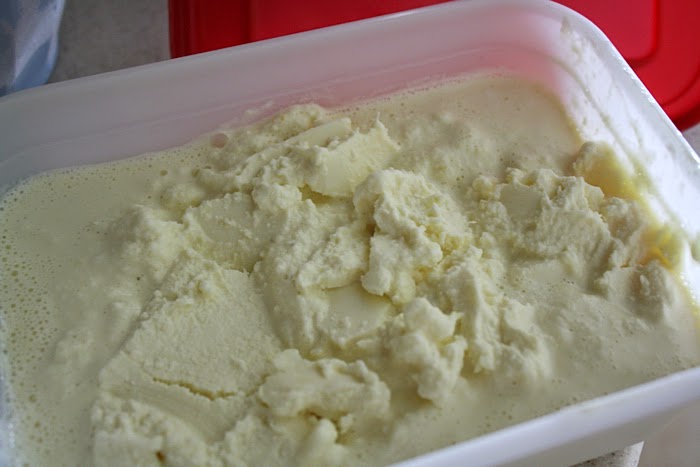
Add the chilled mixture to your ice cream maker and follow your machine's instructions. For best results, place the result back in the freezer for 2 to 3 hours before serving.

homemade Disney Dole Whip pineapple ice cream sorbet sherbet recipe
homemade Disney Dole Whip pineapple ice cream sorbet sherbet recipehomemade Disney Dole Whip pineapple ice cream sorbet sherbet recipe
homemade Disney Dole Whip pineapple ice cream sorbet sherbet recipe

This makes a sweet, creamy not overwhelmingly pineapple-y ice cream. If you'd like a stronger pineapple flavor, I'd imagine you could either add more pineapple chunks or incorporate pineapple juice into the recipe (though it wouldn't be as creamy). Delightfully refreshing, and a slightly different offering than the typical piña colada ice creams available.

food

Easy Recipe: Girl's Life Mustard Potato Salad

Thursday, July 24, 2014

Girl's Life mustard potato salad easy recipe

When I was a preteen, "Girl's Life" magazine was my publication of choice. I'd sneak peeks at "YM," "Seventeen" and "Sassy" at the local library, but "Girl's Life" was the magazine I asked my father to pay for at Barnes & Noble. It also happened to be my first real foray into cooking.

One of my last issues of "Girl's Life" featured a summer picnic cooking theme, and for some reason, the potato salad screamed out to me. I approached my mother and asked her to help me gather the ingredients necessary to make the salad, and it was every bit as delicious as I'd hoped it'd be. And then I lost my magazine.

It wasn't until I moved last year that I discovered the recipe again. I had ripped it out and placed it with out sentimental magazine rip-outs. Recently I decided to make this potato salad again, after about 15 years, and it was still just as great as I remembered it. I did, however, alter the recipe as I'm sure I did the first time around. The original recipe calls for shredded carrot and parsley, but I find that the flavor of the two a bit too overwhelming to be paired with the rest of the salad's flavors.

It's so simple, but to this day, this is still my absolute favorite potato salad recipe.

Girl's Life Mustard Potato Salad

Yields: About 4 servings

Ingredients
1 pound (6 or 7) of medium white or red potatoes
2 green onions
1/4 cup of non-fat plain yogurt
1/4 cup of mayonnaise
1 teaspoon of dijon mustard (I found I needed MUCH more than this, more like 6 teaspoons, but I like it spicy, so test it out as you go)
2 tablespoons of lemon juice
2 tablespoons of sweet relish (or one pickle, finely chopped)
cayenne pepper
ground pepper
paprika

Instructions
Place the potatoes in a large pot and cover with water. Place lid on pot and simmer on medium heat for 20 to 30 minutes, or until the potatoes are tender (when a fork can be easily inserted into them). Remove the potatoes from the pan and refrigerate until they are cooled.

In a large bowl, whisk together the "dressing" ingredients: yogurt, mayonnaise, mustard, lemon juice, relish, a dash of cayenne pepper and ground pepper to taste. Trim off the ends of the green onions, chop, and add to the bowl. 

Cut the potatoes into one-inch pieces and add to the dressing. Stir carefully with a wooden spoon, chill, and sprinkle with paprika just before serving, if you'd like.

Girl's Life mustard potato salad easy recipe

So. Delicious. So easy.

food

Strawberry Season: Easy Homemade Balsamic Strawberry Ice Cream Recipe

Thursday, July 03, 2014

easy homemade roasted balsamic strawberry ice cream recipe strawberry season

Happy Independence Day! If now isn't a time for strawberries and ice cream, I don't know what is. (Or watermelon sorbet, come to think of it.) But this is a story about leftovers. I had some leftover heavy cream from a previous ice cream making endeavor, and a lot of strawberries leftover from my strawberry haul at the start of strawberry season (installments one and two: strawberry pecan bread and strawberry pie).

If you know me, though, you'd know that I like putting a twist on "basic" flavors. And knowing that balsamic vinegar and strawberries often go together, I sought out a balsamic strawberry ice cream recipe. I found quite a few and settled on this one, offered by Closet Cooking, but as usual, I altered it a touch.

Roasted Balsamic Strawberry Ice Cream

Yields: Approximately 1 pint of ice cream

Ingredients
2 cups of strawberries (cleaned and hulled)
2 tbsps of balsamic vinegar
2 tbsps of sugar
1 cup of heavy cream*
1 cup of full milk*
1/2 cup of sugar (white or brown)
3 egg yolks
Salt
*Alternatively, you could use 2 cups of half-and-half

Instructions
To roast the strawberries, preheat oven to 425 degrees Fahrenheit. Toss the strawberries in the balsamic vinegar and sugar and let sit for 20 minutes. Pour the mixture on a baking pan covered in foil folded up on the sides to capture the juices. Roast the strawberries until they start to caramelize, about 15 to 20 minutes. Remove from oven, allow to cool, and place the strawberries and the juices into a container and chill in the fridge.

Heat the cream, milk and sugar in a sauce pan until it almost boils, about 5 minutes. Reduce the heat to low. Add one tablespoon of the cream mixture to the eggs to temper them. Add the egg mixture to the sauce pan. Cook at low heat until it thickens and coats the back of a spoon. You may want to strain the mixture at this point to remove any bits that may have formed while cooking. Add a pinch of salt to help the ice cream freeze, and stir. Chill the mixture in the fridge.

Mix the cream and strawberry mixtures and freeze according to the instructions for your ice cream machine. After removing the ice cream from the ice cream maker, you may need to freeze it for a couple of extra hours so it hardens to a firmer consistency (rather than soft serve).

easy homemade roasted balsamic strawberry ice cream recipe strawberry season

This was really good. As you may have guessed, I don't typically pick up strawberry ice cream at the store, but this was much better than expected (and better than most strawberry ice creams I've had). According to Kevin, the author of Closet Cooking, roasting the strawberries just intensifies the flavor. I could definitely taste a bit of the balsamic vinegar, but only in that it gave the strawberries a bit of dimension. It wasn't sour, and if I hadn't been looking for it, I probably would've never known it was there. If you're looking for a good homemade strawberry ice cream recipe, this is one I highly recommend. Plus, it's easy!

food

Strawberry Season: Homemade Old-Fashioned Strawberry Pie Recipe

Thursday, June 19, 2014

strawberry season easy homemade old-fashioned strawberry pie recipe baking

In Part Two of my "Strawberry Season" recipeganza, I thought it would be nice to try making a strawberry pie. I'd never eaten a strawberry pie before this because they're just not readily available where I've lived. But thinking about strawberry pies reminds me of a guy I used to know (know may be an exaggeration -- we exchanged a handful of e-mails) who told me in one of our first exchanges that his mother baked an amazing strawberry rhubarb pie. That's the only thing I still remember about him, figures.

I used a number of different recipes to come to my resulting pie: Martha Stewart's double pie crust/pâte brisée recipe and I tweaked this AllRecipes recipe to the commenters' suggestions -- thank you, Internet!

strawberry season easy homemade old-fashioned strawberry pie recipe baking

Old-Fashioned Strawberry Pie

Yields: One pie

Ingredients for the Double Crust (for two 9-10 inch crusts)
2 and 3/4 cups of all-purpose flour
1 tablespoon of sugar
1 and 1/2 teaspoons of coarse salt
2 and 1/4 sticks of cold, unsalted butter cut into 3/4-inch pieces
7 tablespoons of ice water (more as needed)

Instructions for the Double Crust
Combine the dry ingredients and pulse them together in a food processor (or whisk together by hand in a bowl). Add the butter and pulse until coarse crumbs form, about 10 seconds. I don't own a food processor, so I used my fingertips and lightly squeezed the ingredients together until they formed coarse crumbs.

Add the cold water, up to 9 tablespoons -- one tablespoon at a time -- if necessary. Pulse until the dough just holds together when pinched. If you're doing this by hand, it's recommended that you pour the 7 tablespoons of water over the flour mixture and mix with a fork until the dough just holds together.

Knead the dough once or twice over a clean work surface, and divide in half. Pat each half into a thick disk, then place on a piece of plastic wrap and wrap tightly. Refrigerate for at least an hour, or overnight. Dough can be frozen up to one month, but thaw in refrigerator overnight before using.

strawberry season easy homemade old-fashioned strawberry pie recipe baking

Ingredients for the Strawberry Pie
Double pie crust
1 cup of white sugar
1/3 cup of all-purpose flour
1/2 teaspoon of ground cinnamon
4 cups of strawberries (I used 2 cups fresh, 2 cups thawed from frozen)
1 tablespoon of cornstarch
2 tablespoons of butter
Lemon juice, to taste

Instructions for the Strawberry Pie
Preheat oven to 425 degrees Fahrenheit. Place one crust in a 9-inch pie pan.

Mix together the sugar, flour, cornstarch, lemon juice (a squeeze or two will do) and cinnamon, and toss through the strawberries. Pour the filling into your crust-lined pan and dot the fruit with butter. Cover with the top crust, and cut slits in the top of the pie. Seal the edges.

Bake for 30 minutes, then turn the oven down to 350 degrees Fahrenheit and bake for another 20 minutes. Allow to cool completely before cutting and serving.

strawberry season easy homemade old-fashioned strawberry pie recipe baking

This makes a great filling that's not too sweet and full of strawberry flavor. The crust is quite hardy and stands up to the strawberry filling -- all around, a good pie that I'd make again (maybe with some rhubarb next time). As with the strawberry bread recipe I previously posted, make sure to keep the pie in the refrigerator if you intend on having it around for more than a day or two. Enjoy!

England

Strawberry Season: Easy Strawberry Pecan Bread Recipe

Thursday, June 05, 2014

strawberry pecan bread easy recipe strawberry season cake

June is often synonymous with "strawberry season," though strawberries does seem more a spring fruit than a summer fruit. But it is in June that "Eton mess" was traditionally served at Eton College in England, and it is in June that strawberries and cream are served to welcome a new Wimbledon tournament.

With an abundance of strawberries at my disposal this year, I decided to whip up a few goodies based around strawberries, and this strawberry pecan bread is the first of these recipes. I'd gotten the idea while flipping through a copy of the Pensacola Florida Junior League's cookbook, which I'd been gifted last year. I sort of grabbed bits from the Junior League recipe and Saveur's to come up with this.

Strawberry Pecan Bread

Yields: 2 loaves
Total Time: About an hour and 15 minutes

Ingredients
3 cups of flour, plus more for dusting
1 teaspoon of baking powder
1 teaspoon of ground cinnamon
1/2 teaspoon of kosher salt
2 cups of sugar
1 and 1/4 cups vegetable oil
4 eggs
4 cups of roughly chopped strawberries
A handful of pecans or nut of choice, chopped
1/2 cup of strawberry or forest fruit jam (optional)
Unsalted butter, for greasing pans

Instructions
Heat oven to 350 degrees Fahrenheit. Grease 2 loaf pans with butter and dust with flour; set aside. Whisk flour, baking powder, cinnamon and salt in a large bowl, and set aside.

In a separate bowl, whisk the sugar, oil and eggs together. Pour the wet ingredients over the dry ingredients and whisk until just combined. Stir in the strawberries and pecans, and pour the batter into prepared pans. If you're using jam, spoon 1/4 cup over each loaf and swirl the jam into the batter with a knife. Bake until golden brown and a toothpick inserted comes out clean, or about one hour. Allow to cool for 30 minutes before slicing and serving.

strawberry pecan bread easy recipe strawberry season cake

This was a really moist and delicious bread. I'd hardly call this bread -- it was more like a cake. A really great yet easy recipe that I'll definitely add to my personal recipe book and make time and time again. Make sure to store it properly if you're making it in the spring or summertime -- because it's so moist, it's bound to go bad faster than most other breads. Enjoy!

food

Easy Recipe: Quesadilla Burger with Sweet Corn Salsa

Thursday, May 22, 2014

easy burger recipe quesadilla beef burger sweet corn salsa Memorial Day best burger burger taco

In preparation for Memorial Day, I've had burgers on my mind. What kind of burger haven't I tried making before? And what burger can I make without hamburger buns (so annoying for small parties, don't you agree? What do you do with the leftover buns)? I had recently picked up a bag of tortillas and everything clicked -- why, quesadilla burgers, of course!

I'm pretty sure I've been lured in by Applebee's quesadilla burger (maybe even more than once?), but seeing as I can't even say I have with confidence, I'm willing to bet that it wasn't that great. After perusing the internet for an easy yet promising recipe, I ended up adapting a Food Network recipe.

Quesadilla Burger and Sweet Corn Salsa

Yields: 4 burgers
Total Time: About an hour

Ingredients for the Burgers
1 pound of ground beef, preferably 80% lean/20% fat
2 tablespoons of cilantro, chopped
1/2 an onion, grated
2 cloves of garlic, minced
1 tablespoon of adobo sauce, or hot sauce (I used my all-time favorite, Cholula)
1/2 tablespoon of ground cumin
1 teaspoon of salt
1/4 teaspoon of black pepper
Cooking oil
Flour tortillas

Ingredients for the Salsa
1 ear of corn
1/2 a red onion, chopped
2 tablespoons of cilantro, chopped
1 teaspoon of ground cumin
A dash of hot sauce
A couple squeezes of lemon juice
Salt
Ground pepper
Cooking oil

Instructions
Mix together all the burger ingredients (the beef, 2 tablespoons of chopped cilantro, the grated onion, 2 cloves of minced garlic, 1 tablespoon of adobo sauce/hot sauce, 1/2 tablespoon of ground cumin, 1 teaspoon of salt and 1/4 teaspoon of black pepper), just enough to combine. Shape into 4 burger patties and cover.

Heat a pan over medium-low heat, and add a tablespoon of cooking oil. Grilled the ear of corn on each side until grill marks appear. Remove from heat and allow to cool. 

In a small bowl, mix together the rest of the salsa ingredients (1/2 a chopped red onion, 2 tablespoons of chopped cilantro, 1 teaspoon of ground cumin, dash of hot sauce, lemon juice, a pinch each of salt and ground pepper ... I also added a handful of cherry tomatoes.) Cut the corn off the cob and mix into the rest of the salsa ingredients. Set aside.

Warm tortillas (either 1 or 2 per burger, depending on whether you'd like a "sandwich"-style burger or a "taco"-style burger) in a pan or warmer of choice. Set aside and grill the patties for about 5 minutes on each side, or until the juices run clear.

Remove from pan and set atop the tortillas. Add toppings of choice (cheese, guacamole/avocado, tomatoes, etc) and corn salsa and serve.

easy burger recipe quesadilla beef burger sweet corn salsa Memorial Day best burger burger taco

I absolutely loved the flavor of the burger. The cumin really gave it a nice earthy yet grilled flavor, and the cilantro gave it extra dimension. The corn salsa was the real treat, adding a sweetness to the burger. You can definitely substitute chicken or turkey for beef, of course. I started out making a taco-shaped burger, but then decided to cut it in half just before serving, for ease of eating. Highly recommended and I plan on making these again!

food

Easy Recipe: Homemade Chicken Tortilla Soup

Thursday, May 08, 2014

Chicken Tortilla Soup easy recipe homemade mexican food

Happy Belated Cinco de Mayo! Chicken tortilla soup is one of those things that took me forever to try, even though Mexican cuisine is one of my favorites. I've only had it once, but I was so pleasantly surprised by the depth of flavor that I vowed to someday make it at home. Aside from the grilled chicken (which you could totally substitute leftover grilled or rotisserie chicken for), the recipe really is quite simple.

I took my recipe from The Pioneer Woman because I loved her show when I had cable (and again when I had Netflix), and I'd never tried any of her recipes. This seemed like a good opportunity. As usual, I tweaked the recipe to my liking.

Chicken Tortilla Soup

Yields: 8 servings
Total Time: About 1 hour 45 minutes

Ingredients
2 boneless, skinless chicken breasts (I used 4 thighs instead)
2 tablespoons of olive oil
1 1/2 teaspoon of cumin
1 teaspoon of chili powder
1/2 teaspoon of garlic powder
1/2 teaspoon of salt
1 cup of diced onion
1/4 cup of diced green bell pepper
1/4 cup of red bell pepper
3 cloves of garlic, minced
1 10 ounce can of diced tomatoes with peppers (chili or jalapeno)
32 ounces of low sodium chicken stock
4 cups of hot water
2 15 ounce cans of black beans, drained
3 tablespoons of cornmeal
plain tortilla chips

Instructions
To make the grilled chicken, preheat your oven to 375 degrees Fahrenheit. Mix the cumin, chili powder, garlic powder and salt together. Drizzle one tablespoon of olive oil over the chicken and sprinkle a little bit of the seasoning mix over both sides of the chicken. Set aside the rest of the seasoning mix.

Place the chicken breasts on a baking sheet and bake for 20 to 25 minutes, or until chicken is done. Use two forks to shred the chicken and set aside for later.

In a large pot (a seriously large soup pot), heat one tablespoon of olive oil. Add the onions, peppers and garlic. Stir and allow to cook for a little bit before adding the remaining seasoning mix and the chicken. Stir.

Pour in the diced tomatoes, chicken stock, water and black beans. Bring to a boil and reduce heat to a simmer for 45 minutes, uncovered.

Mix the cornmeal with water so that it's liquid enough to pour cleanly into the soup (much more water than in my photo below). Pour it into the soup and simmer for another 30 minutes. At this point, do a taste test and add more chili powder and salt to taste. Remove from heat and allow to sit for 15 to 20 minutes before serving. Crumble tortilla chips on top just before serving, and add a squeeze of lime or lemon juice to each bowl of soup. Add your favorite toppings (cheese, cilantro, raw onions, tomatoes, salsa, avocado, etc).

Chicken Tortilla Soup easy recipe homemade mexican food

I cannot recommend more that you adding toppings to the soup. Though it is a very flavorful soup, the longer it cooks, the more the distinct flavors meld together. The lime/lemon juice is indispensable and makes for a fresh, flavorful soup. Happy eating!

food

Easy Recipe: Aloo Gobi

Thursday, May 01, 2014

Easy recipe aloo gobi

I guess April, along with being Spring Cleaning month, is going to be Indian food month here at Maxine Writes HQ. In my last entry about Butter Chicken, I mentioned rarely being able to find someone to eat Indian food with. My entrée of choice when I do get around to having Indian food is aloo gobi.

If you've never had aloo (potatoes) gobi (cauliflower), it's a dish made with ... potatoes and cauliflower and garam masala sauce, along with spices. I tried out a simplified (a.k.a. fewer unobtainable ingredients) recipe from Food.com user chuckdarwin and made some minor adjustments. Since it's a vegetarian dish, it really is quite easy to make -- and tasted just as I remembered it from the last time I had it ... a long time ago.

Aloo Gobi

(Chuck says this makes 8 servings, but this made 4 Maxine-sized servings)

Ingredients
1/4 cup of vegetable oil
1 large onion, chopped
1 bunch of fresh cilantro, separated into stalks and leaves and roughly chopped
1 small green chili pepper, chopped into small pieces (or one teaspoon of chili powder)
1 large cauliflower, chopped into even pieces
3 large potatoes, peeled and cut evenly (I used small potatoes and didn't peel 'em)
16 ounces of canned diced tomatoes
fresh ginger, peeled and minced or grated
fresh garlic, chopped
2 teaspoons of garam masala
1 teaspoon of cumin seed
2 teaspoons of turmeric
1 teaspoon of salt

Instructions
Heat vegetable oil in a large saucepan. Add the onion and cumin seeds to the oil, stir and cook until the onions become golden and translucent. Add the cilantro stalks, turmeric, salt and chopped chilis. Stir in the tomatoes. Add the ginger and garlic and mix thoroughly.

Add the potatoes and cauliflower to the sauce, along with a few tablespoons of water (ensuring that the mixture doesn't stick to the saucepan). Coat the potatoes and cauliflower with the sauce, cover and simmer until the potatoes are cooked (about 20 minutes).

Add two teaspoons of masala and stir. Sprinkle the cilantro leaves on top of the curry, remove from heat, cover and leave for as long as possible before serving.


SO. GOOD.

YouTube

What I'm Reading

Instagram